
How to Install A Quartz Countertop Yourself
Our guide for installing your new quartz kitchen countertops. Take pride in installing your new quartz countertop by yourself by following these steps.
Aug 4, 2024
So you’ve finally decided on starting a kitchen remodel. You insist on installing a new quartz countertop all by yourself. It can be really overwhelming and complicated without the proper steps and instructions. That’s why we’ve put together a comprehensive DIY guide that can help you install your new quartz counter today! Our goal with this article is to provide you with a better understanding of how to install a quartz countertop.
Equipment You Need To Get Started
Before you get into the installation, we have some recommended tools and items you will need in order to complete your installation. We also encourage you to have at least one other person present to help during installation. Quartz countertops can be incredibly heavy, weighing 25 pounds per square foot, depending on the size and thickness of the slab. Trying to carry a quartz slab yourself could result in dropping the slab or even worse, serious injuries. These tools are a recommendation, so you might not need them all, these are just the essential tools we believe are necessary for a successful installation. These are the tools we recommend you get before you start your DIY installation:
Quartz countertop
Circular saw with a diamond masonry blade
Leveller
Measuring Tape
Silicone adhesive
Painter’s tape
Ledger boards
Wooden shims
Getting A Quartz Slab
Measure Your Cabinet

we recommend you do before you go ahead and pick a quartz stone for your kitchen. Measure your current kitchen counter with a measuring tape to get accurate dimensions for your new countertop. When determining the final measurements to order, add an extra inch to your dimensions. This gives your countertop the standard overhang. If your countertop is intended to be an island with seating, the standard overhang length would be 12 inches. Having these dimensions will save you and your quartz countertop installer a lot of time from going back and forth. Your quartz countertop installer will really appreciate a prepared customer.
Selecting Your Quartz Countertop
There are endless options to consider when choosing a quartz countertop. From white quartz to beautiful rose quartz, there are a ton of stunning quartz varieties. Consider the colour and design that would pair well with your kitchen. With numerous designs and patterns, you are bound to find a quartz countertop for your kitchen. After you determine the design you want, you need to choose an appropriate thickness for your countertop. On average, quartz countertops have a thickness of 1.25 Inches. This thickness is pretty standard for most kitchen and bathroom applications. A thinner or thicker thickness depends on your needs within the kitchen
Preparing Installation Area
This step involves removing the existing countertop, removing your sink (if necessary), and cleaning the leftover cabinets. At this point, you need to check if the cabinet surface is level or not with a leveller. If the surface is not completely level, add as many wooden shims as needed to level out the surface. Last but not least, you can finally paint or seal your cabinets so that they are ready for countertop installation. Remember to allow your paint, stain or sealing agent to completely dry before installing the countertops.
Cutting your Quartz Countertop
When you get your quartz slab, take it out and dry-fit it to your countertop area. If you have multiple slabs, make sure the slabs fit and don’t create any large or awkward gaps between themselves or other materials. Your pre-cut quartz slab could still need some adjustments upon delivery. Draw a line along the portion you identify on the quartz that needs to be removed with a straight edge and pencil. Draw the line around the entire quartz slab, making sure all lines are connected.
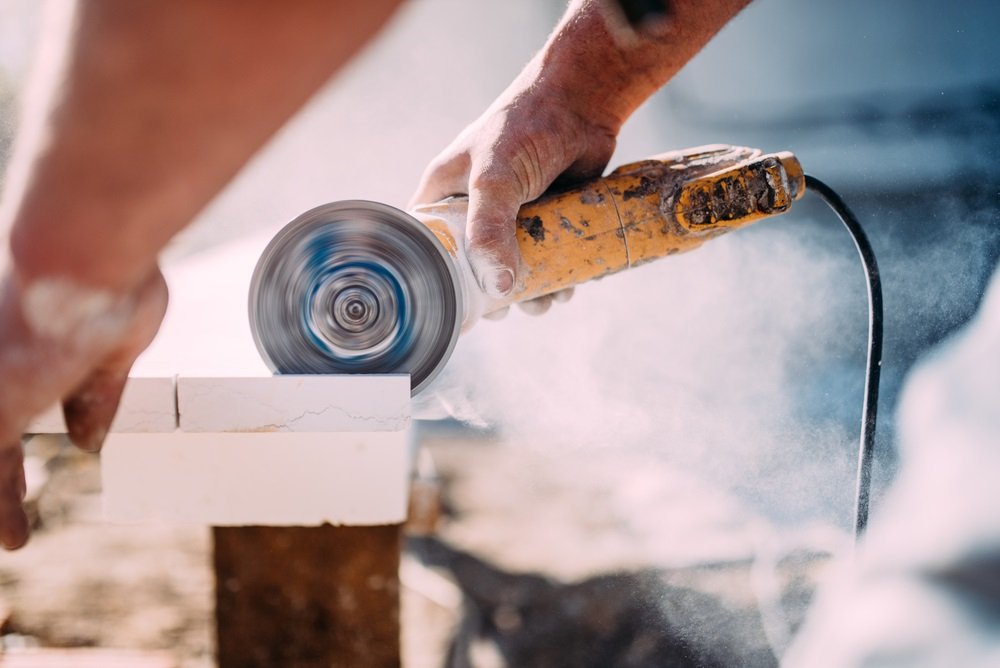
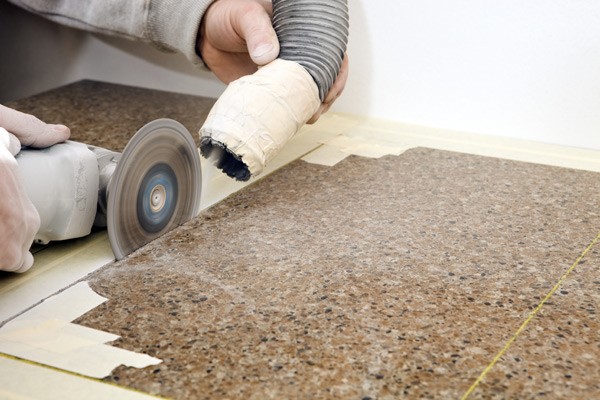
Now you need to prepare your power saw to cut the quartz. The first thing is to make sure your blade is a diamond masonry blade. If your blade is not designed to properly cut quartz it can damage your slab or ruin your power saw in many ways. If you already have a diamond blade then you don’t need to worry about this step.
You can now cut your quartz. Start by setting your blade to half the depth of the quartz slab. Lay your quartz on a flat surface and start sawing along your marked line. Use your non-dominant hand to stabilize your body as you guide the saw with your dominant hand. When you complete one side, flip the quartz slab to repeat this step. Something you may notice is the blade can get incredibly hot. To keep the temperature of the blade low, remove the blade from the quartz and rest it every 30-45 seconds.
Install Ledgers and Sink
If you did end up removing your sink to prepare for the countertop installation you need to reinstall a new sink before adding the new countertop. You also need to inspect your cabinets for areas with low support to install ledgers. Quartz can be placed directly on cabinets, compared to granite or marble countertops, but they are also still really heavy. This can weaken the integrity of your kitchen cabinets and can collapse them if not supported properly. If you see any weak areas that need to support the countertop, add a 2-inch ledger into the wall, flush with your cabinets, to add support.
Apply Silicone Adhesive
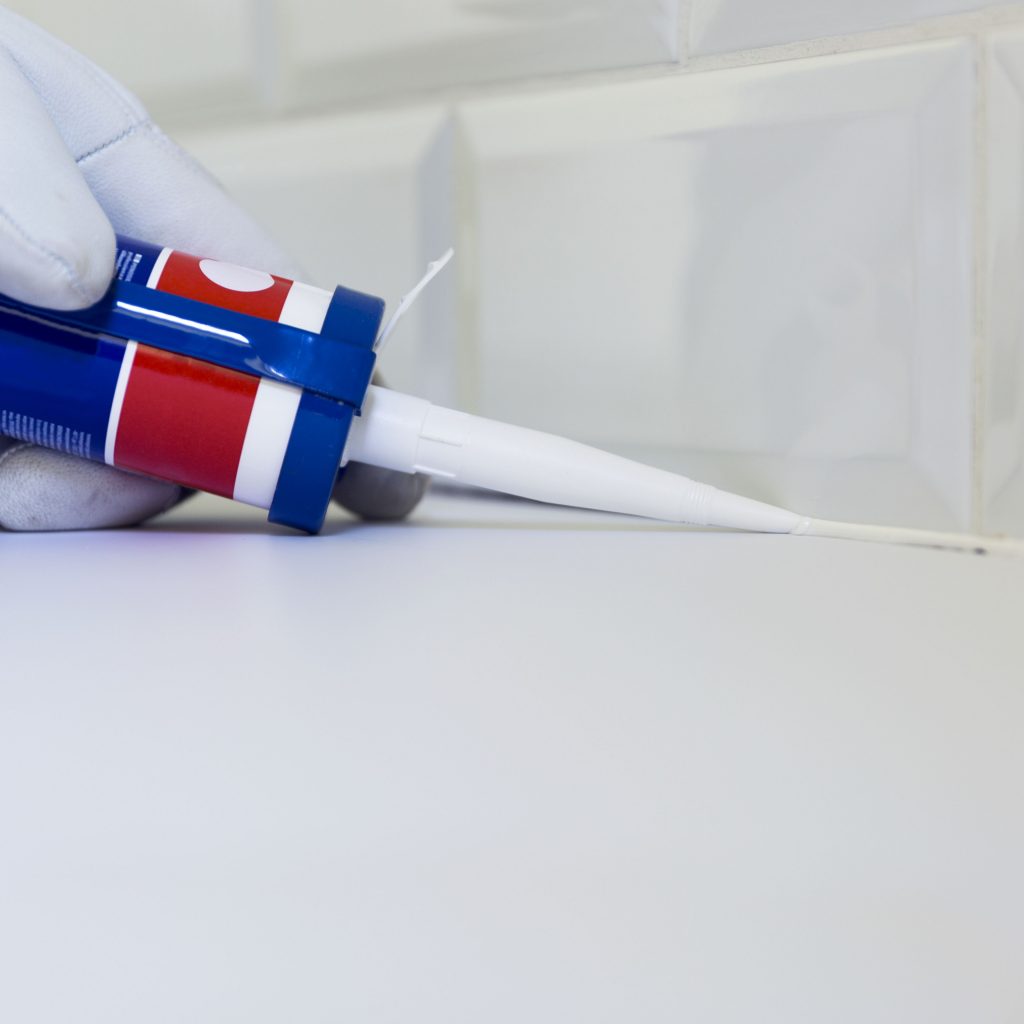
The last step before we can place our countertop on is to apply the silicone adhesive to the top of the cabinets. Squeeze and apply 2-3 inches of the adhesive to the top of the cabinets. Spread your applications apart by 6-9 inches to ensure all the silicone can spread out and hold onto the counter tightly.
Quartz Countertop Installation
Attach Quartz Slab To The Cabinet
With the silicone applied you can finally attach your quartz slab to the cabinet. Depending on the size of the slab, you should have someone here to help you. An average-sized kitchen island countertop can weigh up to 500 pounds. Lower the quartz slab into place. Press down along all the adhesive areas to guarantee the quartz slab sticks to the cabinet underneath.
Seal seams (If Any) Between Slabs
Our last and final step is only necessary if you have multiple quartz slabs installed. You can avoid sealing any joints if your first dry fitting was successful. If you have multiple quartz slabs then it’s inevitable that you will have seams in between pieces. Ask your quartz supplier about which product to use to seal slab joints. From our experience, silicone adhesive works fine. Apply the adhesive into the space between each slab. Fill them completely and allow for them to dry completely before you start using the countertop
Conclusion: You'll Need Tools and Skills
We hope this article gave you a greater understanding of what it takes to install a quartz countertop. There are a lot of steps and to be honest, a lot of things can potentially go wrong. This can cost you a lot more time and money than you expected. This is why we recommend going with a professional quartz countertop installer that has lots of experience performing these installations.
At Caviar Kitchen and Stone we offer quartz installation services that are quick, clean and especially not too expensive. If you’re worried about the installation cost, talk to us about it. We are more than happy to see if we can help you while working within your budget. If you have any questions at all you can contact us HERE. One of our countertop installation experts would love to answer all your questions. Visit us at Caviar Kitchen to view our collection of quartz suppliers today.
Plan your project with us!
Skip the stress and uncertainty. Our professionals ensure a beautiful, lasting result for your kitchen, backed by a 5-year warranty.